 how-to
How to Polish Industrial Concrete Floors Without Guesswork
Last Updated: October 31, 2026
Quick Summary
To polish industrial concrete floors, grind the slab flat with coarse metal-bonded diamond tooling, then refine it through a sequence of finer diamond abrasives until you reach the specified sheen. Nothing is painted on top, the floor itself becomes the finish, so each grit must fully remove the previous grit's scratches. Assess and repair the slab, run a test patch, and match the grit sequence to the finish specification before the first pass.
- Dry polishing is the default for most industrial work because it avoids slurry and keeps the floor usable.
- Metal-bonded diamonds cut and level; resin-bonded pads refine from the mid grits upward.
- Overlap each run by roughly a third of the head width to avoid stripes and missed strips.
- Use the scratch test under raking light to confirm each grit's pattern is gone before moving on.
- Sweep or vacuum high-traffic aisles daily, since grit under forklift tyres dulls the surface.
Table of Contents
- What Industrial Concrete Polishing Actually Involves
- Assessing and Repairing the Slab Before You Start
- Concrete Polishing Equipment for Industrial-Scale Floors
- Wet or Dry Polishing: Choosing Your Method
- Concrete Floor Grinding Steps From First Pass to Final Polish
- The Diamond Grit Sequence for Concrete Polishing
- Dust Control, Safety and Keeping the Facility Running
- Polished Concrete Floor Maintenance and Lifecycle Costs
- Frequently Asked Questions
What Industrial Concrete Polishing Actually Involves
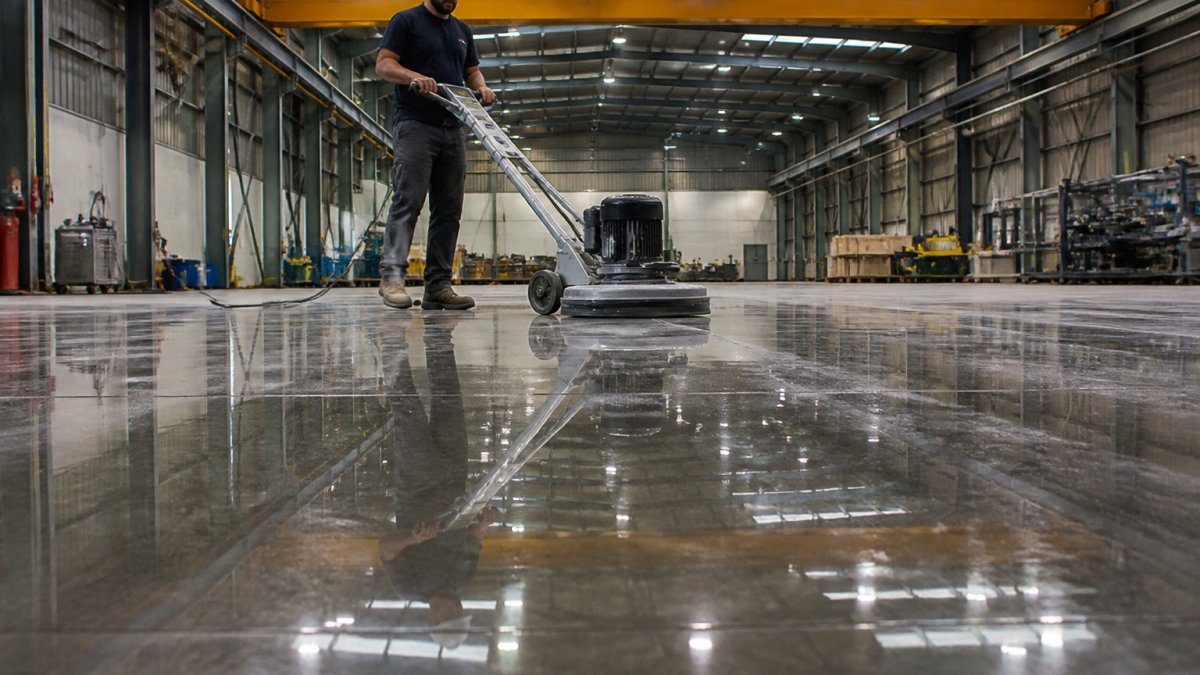
Industrial concrete polishing is a mechanical process that grinds a concrete slab flat and refines the surface through a sequence of diamond abrasives until it reaches the desired sheen. Nothing gets painted on top, the floor itself becomes the finish. At AquaBlast Elite, we explain it this way: you are not coating a floor, you are rebuilding its surface one grit at a time.
Mechanical grinding, not a coating
A coating sits on top of the slab and peels, chips or wears through under forklift traffic. Polishing removes material instead: diamond tooling shaves away the top layer, closes the pores, and leaves a dense, hard surface that shrugs off scuffs and tyre marks. That matters on an industrial floor, where abrasion is constant and downtime is expensive.
Why industrial floors differ from residential slabs
Warehouse and factory slabs are bigger, older and harder worked. They carry heavy point loads, joint systems, and years of contamination, and many were poured as working slabs, not finish slabs, so flatness and surface condition vary. That is why industrial concrete work needs heavier grinders, more aggressive first passes, and a realistic production plan.
Assessing and Repairing the Slab Before You Start
The biggest mistake we see is grinding before anyone has read the floor. Walk the slab first and map it.
Then repair. Fill cracks and divots with a suitable patching compound. Strip old coatings, because diamond tooling will smear them rather than remove them cleanly.
Watch out: skipping the test patch is how crews destroy a set of diamond tooling in the first hour and discover the slab is far harder or softer than expected.
Concrete Polishing Equipment for Industrial-Scale Floors
Equipment choice decides your production rate. Industrial concrete polishing equipment means ride-on or heavy walk-behind grinders with high horsepower, wide heads, and reliable dust extraction. A small single-head grinder will technically polish a warehouse floor. It will also take weeks.
Grinders, tooling and production planning
Match the machine to the floor area and finish spec. Plan the grit sequence, passes per grit and square metres per shift, then plan the facility around it: which aisles close first, how power reaches the machine, and where dust extraction units sit.
If you are weighing doing this in-house against bringing in a crew, our guide on how to vet industrial cleaning contractors sets out the criteria worth checking before you commit.
Wet or Dry Polishing: Choosing Your Method
Dry polishing uses dust extractors to capture fine dust at the head. It is the default for most industrial work because you avoid slurry and the floor stays usable around the work zone.
Choose dry where dust extraction is set up properly and the facility needs to keep operating. Choose wet where heat build-up is a real risk or local dust rules make it the safer call.
Concrete Floor Grinding Steps From First Pass to Final Polish
Coarse grinding and levelling
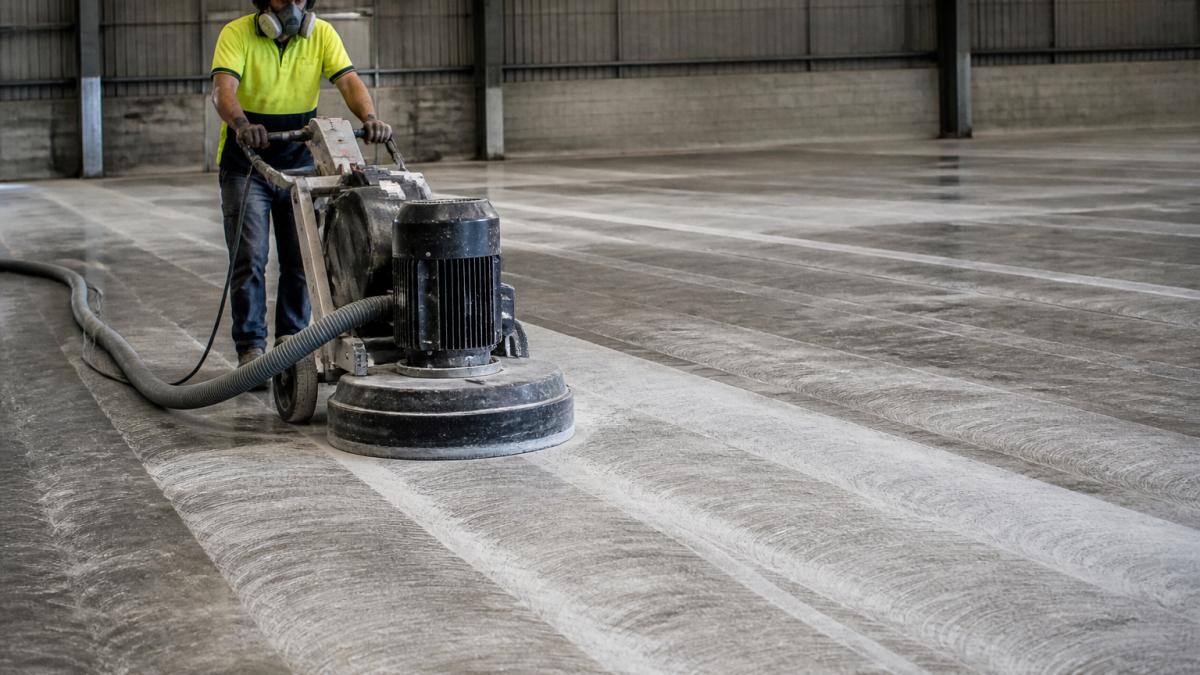
Start with coarse, metal-bonded diamond tooling. This first stage cuts the surface flat, removes imperfections, and opens the aggregate. It is slow, loud and dusty, and it is where the finish is really decided. Get the floor level here and every later grit behaves predictably.
Overlapping passes and steady pace
Move the grinder in consistent, overlapping passes at a steady pace so you do not leave stripes or missed strips. Keep machine speed constant, because rushing a pass leaves scratches the next grit has to fight. The quality of the final polish comes from discipline in the early passes, not the last one.
The Diamond Grit Sequence for Concrete Polishing
The diamond grit sequence is the backbone of the whole job. It moves from coarse to fine in steps, each existing to remove the scratches left by the previous grit. Properly calibrating these abrasive transitions ensures a durable finish that simplifies long-term commercial floor care by preventing the surface degradation often caused by trapped debris.
Metal-bonded versus resin-bonded tooling
Metal-bonded diamonds are the cutting tools.
Resin-bonded pads are the refining tools. Diamond held in a softer resin matrix breaks down as it works, exposing fresh diamond and producing a finer scratch pattern.
A common industrial pattern is to run metal-bonded tooling through the coarse and early refining stages, then switch to resin-bonded pads for the mid and fine stages.
A practical industrial grit sequence
A workable sequence for a typical industrial slab runs roughly as follows. Treat the grit numbers as a guide, not a rule, because tooling manufacturers number their segments differently and slab hardness changes how each grit behaves.
- Coarse metal-bonded (typically 16 to 30 grit equivalent): cut the surface flat, remove high spots, coatings and contamination, and expose aggregate. This is the slowest and most important stage.
- 30 to 40 grit metal or hybrid: remove the coarse scratches from the first cut and begin refining the surface.
- Mid grits (roughly 50 to 120 grit, resin-bonded): close the surface pores, build clarity, and remove the scratch pattern from the previous step.
Each grit should remove the scratch pattern of the one before it completely. If you can still see the previous grit's scratches under raking light, you have not finished that step, regardless of how many passes you have made.
Pass counts, overlap and the scratch test
Passes per grit are not fixed, they depend on slab hardness, machine weight, head pressure and the grit itself. Run overlapping passes until the previous grit's scratch pattern is gone, then run one more pass for consistency.
A simple field check is the scratch test. Stop the machine, clean a small area, and look at it under raking light from a low angle.
Matching the sequence to the finish specification
Choose the sequence to hit a measurable outcome, not a fixed recipe. A high-gloss finish with minimal aggregate exposure means the full sequence and more time on fine resin pads; a matte or satin finish with exposed aggregate may stop at a mid grit and accept a more open surface.
Here is the practical industrial grit sequence the article lays out, with each stage's job.
| Stage | Grit range | What it does |
|---|---|---|
| Coarse metal-bonded | 16 to 30 grit equivalent | Cut flat, remove high spots, coatings, contamination, expose aggregate |
| Metal or hybrid | 30 to 40 grit | Remove coarse scratches and begin refining the surface |
| Mid grits, resin-bonded | Roughly 50 to 120 grit | Close pores, build clarity, remove previous scratch pattern |
| Fine resin pads | Roughly 200 to 400 grit | Bring up sheen and start to define gloss level |
| Finishing pads | 800 grit and finer, plus final polish | Achieve the gloss level named in the specification |
Dust Control, Safety and Keeping the Facility Running
Silica dust is the headline risk on any concrete grinding job, managed with proper extraction, not a broom.
Keeping the facility running is a planning problem. If you are bringing in a crew, our guide on how to prepare for industrial cleaning services covers site assessment and safety setup. For ongoing safety and upkeep, see our guide to maintaining industrial concrete floors safely.
Polished Concrete Floor Maintenance and Lifecycle Costs
A polished floor is low maintenance, not no maintenance. The cleaning routine and repair plan decide whether the gloss level and surface hardness you paid for survive the first few years of forklift traffic. This section sets out what to specify, how to inspect it, and how to plan maintenance and lifecycle cost.
Specifying a measurable finish
A polished concrete specification should name outcomes a facility owner can inspect, not just a grit sequence. The measurable criteria worth writing into the specification include:
- Gloss level: measured with a gloss meter at a defined angle (60-degree gloss is common for floor finishes). Specify a target range and the test method, and agree where on the floor the readings are taken.
- Aggregate exposure: define the class (for example, minimal exposure, partial exposure or full exposure) and describe what the owner should see. Photographic reference panels are the practical way to remove ambiguity.
- Flatness: specify a flatness tolerance using a recognised method such as the F-number system or a straightedge tolerance over a defined length. Industrial slabs often need a tighter tolerance than a general floor because of racking and forklift traffic.
Agreeing these criteria before work starts turns the final inspection into a checklist rather than an argument, and tells the polishing crew where to stop, protecting both the programme and the budget.
Maintenance frequency for high-traffic industrial floors
Maintenance frequency should follow traffic and contamination, not a fixed calendar. A practical pattern for an industrial facility is:
- Daily: sweep or vacuum high-traffic aisles and dock areas to remove grit, which acts like sandpaper under forklift tyres and dulls the surface.
- Weekly: damp mop with a neutral pH cleaner across the main traffic routes. Avoid acidic or strongly alkaline cleaners, which can attack the densified surface over time.
- Monthly: inspect joints, cracks and any sealed areas, and reseal where the sealant has failed. Joints are where water and contamination enter the slab.
For the day-to-day routine, our guide on how to clean industrial concrete floors covers the practical steps, and our broader page on maintaining commercial concrete surfaces helps with long-term planning.
Lifecycle costs compared with coatings
Lifecycle cost is where polishing earns its place on an industrial floor, but compare total cost over a defined period, not initial price alone. A coating has a shorter service life under heavy traffic and needs recoating on a cycle, with the associated disruption.
When comparing options, build the budget around:
- Initial installation cost: grinding, tooling, densifier and labour, priced per square metre.
- Recurring maintenance cost: cleaning labour, consumables and joint repair.
- Recoating or re-polishing cost: the expected interval and cost per square metre for each option.
A common pattern is a higher initial cost but lower recurring cost for the polished floor, so the crossover point depends on traffic intensity and planned facility life.
For the technical background on crystalline silica and safe handling during maintenance and repair work, the Safe Work Australia silica guidance is the reference to follow, and Work Health and Safety regulations set out the duties that apply on site.
Frequently Asked Questions
What equipment is needed to polish an industrial concrete floor?
You need a heavy-duty floor grinder sized to the slab area, a matched set of metal-bonded and resin-bonded diamond tooling, and a dust extraction unit or slurry vacuum. Add a concrete densifier for surface hardness, plus personal protective equipment including hearing protection, eye protection and respiratory protection. For large facilities, plan production around machine speed and grinding pressure so passes stay consistent. If you lack the equipment or the crew to run it safely, consider engaging a professional concrete polishing contractor.
What diamond grit sequence should you use for concrete polishing?
Start coarse with metal-bonded diamonds, commonly 30-grit or 40-grit, to cut through surface imperfections and level the slab. Then step through resin-bonded abrasives in sequence, typically 50, 100, 200, 400, 800 and up to 1500 or 3000 grit depending on the gloss level you want. Never skip a grit: each pass removes the scratch pattern left by the previous one. The exact diamond grit sequence for concrete polishing depends on concrete hardness, aggregate exposure and the finish specification.
Can you polish an existing concrete floor?
Often yes, provided the slab is structurally sound. Check concrete age and curing first, then assess for cracks, spalling and contamination. Old slabs with heavy coatings, oil stains or failed patches need repair and surface preparation before any grinding begins. A polished finish also depends on surface hardness, so a chemical hardener or concrete densifier is usually applied during the process. Have the slab assessed before committing to a full polish.
How do you maintain a polished industrial concrete floor?
Sweep or auto-scrub regularly to remove grit that dulls the sheen under industrial traffic. Use a neutral pH cleaner rather than harsh acids, and avoid abrasive pads that scratch the polished finish. Reapply a concrete densifier or guard product periodically to protect surface durability, and book a light re-polish when gloss drops in high-traffic aisles. A written polished concrete floor maintenance plan with clear intervals keeps lifecycle costs predictable and protects the floor sealing and protective coating over time.
Polishing an industrial floor well comes down to assessment, the right equipment, and discipline through the grit sequence. Get any of those wrong and the floor shows it. If you would rather hand the heavy work to a team set up for it, AquaBlast Elite brings high-pressure cleaning equipment, customised solutions for every project, and skilled professionals with specialised expertise across large-scale surfaces. Get started with AquaBlast Elite and book a call to plan your floor.