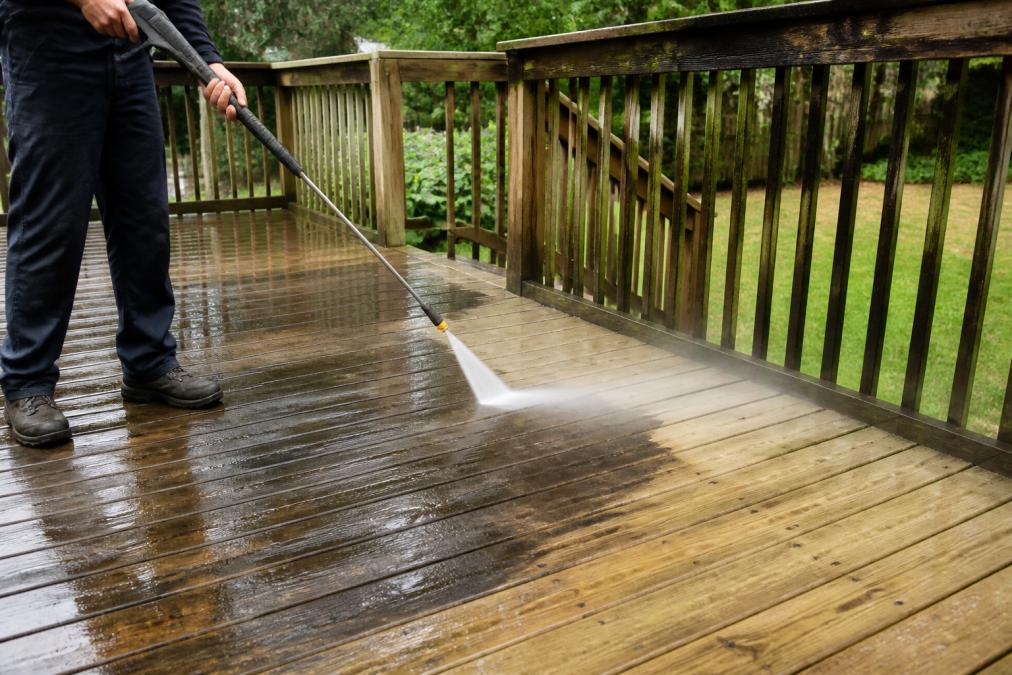
 how-to
Safe Pressure Washing for Old Decks: A How-To Guide
Table of Contents
- Can You Pressure Wash an Old Deck Without Damaging It?
- Best Pressure Washer Settings for Timber Decks
- What You'll Need Before You Start
- Step-by-Step Guide to Safe Pressure Washing
- How to Remove Mould From Timber Decking Safely
- When to Sand Instead of Pressure Wash a Deck
- Common Mistakes to Avoid With Old Timber
- Conclusion: Preserve Your Deck's Lifespan
- Frequently Asked Questions
Last Updated: September 8, 2026
Can You Pressure Wash an Old Deck Without Damaging It?
Yes, you can pressure wash an old deck safely, but only if you lower your expectations about pressure and raise your standards for technique. The safe pressure washing for old decks process is less about blasting away grime and more about coaxing it off weathered timber without tearing the wood fibers loose. We see the aftermath of DIY over-pressurising every summer: furred surfaces, split boards, and water forced deep into the grain where it starts rot.
The core rule is simple: old timber is soft timber. Years of sun and rain break down the lignin that binds wood cells, leaving the surface vulnerable. A machine set too high will strip the soft springwood between the grain lines, leaving a rough, fuzzy texture that holds dirt faster than before. This guide covers the exact settings, nozzles, and techniques that protect aged decks, plus when to stop washing altogether and sand instead.
Below, we’ll walk through the specific steps our technicians use, the mistakes that send homeowners to the timber yard, and how to judge whether your deck is a candidate for washing or replacement.
How to Tell if Your Deck is Too Old for Pressure Washing
Start by assessing the wood’s condition before you connect a hose. Press a flathead screwdriver into several boards across the deck. If the tip sinks in easily, the wood is spongy and likely rotting beneath the surface; pressure washing will only accelerate the decay by driving water deeper into compromised areas.
Look for boards that are cupping, cracking, or lifting nails. Surface checks (small hairline cracks) are normal on weathered timber and wash fine. Deep splits that run the length of a board signal structural weakness. If more than a quarter of your boards show rot, soft spots, or severe splitting, washing is cosmetic treatment on a deck that needs board replacement. Similarly, if the deck was built from unseasoned pine or a softwood species without proper treatment, it may never handle water blasting well.
Best Pressure Washer Settings for Timber Decks
The ideal pressure for old timber decks sits between 1200 and 1500 PSI, which is far lower than the 2000 to 3000 PSI machines other providers push (familyhandyman.com). If your unit only has a single high-pressure setting, you can compensate by widening the spray angle, increasing your distance, and using a lower-flow nozzle.
Hardwoods like tallowwood, blackbutt, and treated pine in good condition can tolerate the higher end of that range. Softwoods such as cedar and untreated pine demand the lower end. The water flow rate, measured in litres per minute, matters as much as pressure. High flow at low pressure cleans well; low flow at high pressure damages wood. A machine delivering 10 to 13 litres per minute at 1300 PSI is ideal for many residential timber decks.
Choosing the Right Nozzle and Spray Pattern
Nozzle degree determines the fan spread of the water and directly controls surface impact. A 25-degree nozzle (white) is the widest you should use on timber, producing a fan that spreads the force across a larger area. Never use a 0-degree (red) or 15-degree (yellow) nozzle on wood, as these concentrate the stream into a cutting jet that will gouge the surface.
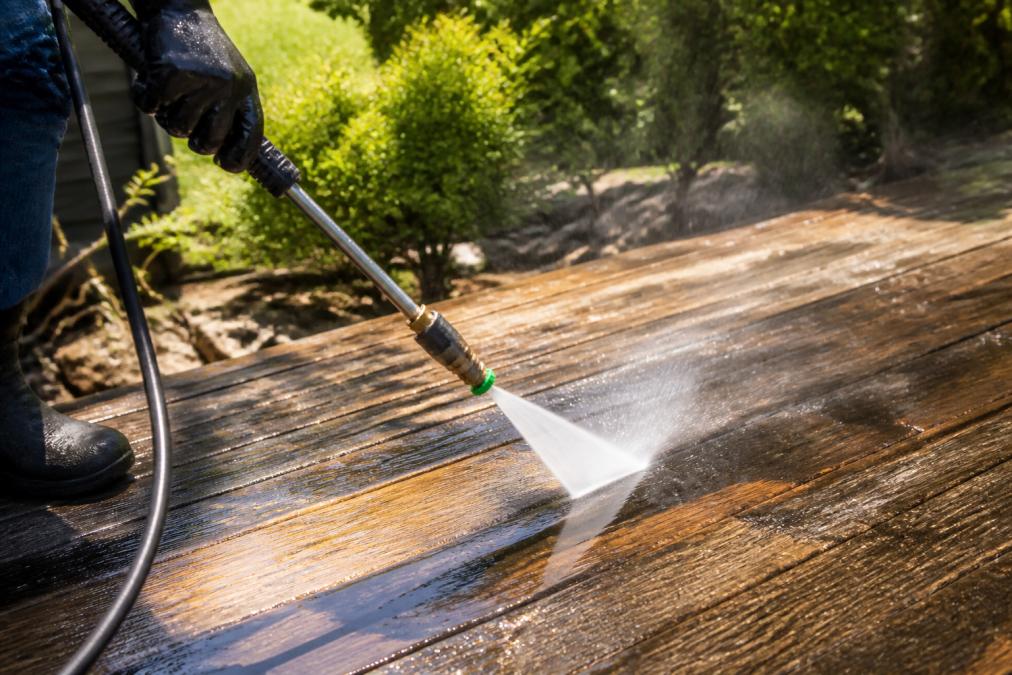
Hold the wand so the fan tip is 25 to 30 cm from the surface. Keep the spray moving in smooth, sweeping arcs that overlap by half. Stopping the wand while the trigger is engaged, even for a second, lets the stream chew into one spot and create a visible depression in the wood grain.
What You'll Need Before You Start
Gather the right gear before you begin, because stopping mid-job to hunt for supplies invites rushed technique. You will need a pressure washer capable of 1200 to 1500 PSI, a 25-degree fan nozzle, and a surface cleaner attachment if your deck has large open areas. A surface cleaner spins two jets inside a shroud, which keeps the spray distance consistent and reduces the risk of streaking.
Protective gear is non-negotiable. Wear closed-toe boots with good grip, safety glasses that seal against splashback, and hearing protection if your machine is loud. Old decks harbour splinters and hidden nails, so gloves are wise. For chemical treatment, use a pump sprayer for pre-treatment and a stiff-bristled brush (never wire, which scratches timber) for working detergent into the grain.
Consider the weather. Wash on an overcast day or in the early morning, because direct sun dries detergent too quickly and leaves residue streaks. Check that runoff from your deck won’t flood garden beds or flow toward storm drains. Many municipalities have water runoff restrictions during dry periods, so confirm local rules before you start, particularly if you plan to use chemical cleaners.
Step-by-Step Guide to Safe Pressure Washing
Follow this sequence to clean your deck without damaging the timber substrate. The process takes most of a day for an average-sized deck, so plan accordingly.
Step 1: Clear the Deck and Pre-Treat Stains
Remove all furniture, potted plants, and rugs. Sweep the surface thoroughly to lift leaves and grit, which would otherwise act as sandpaper under the water stream. Cover nearby plants with a tarp if you are using chemical cleaners, as runoff can harm foliage.
Pre-treat oil, grease, and tannin stains with a deck-specific cleaner applied via pump sprayer. Let it sit for the time specified on the label, typically 10 to 15 minutes, but do not let it dry. For stubborn mould and mildew, apply a dedicated mould remover and allow it to dwell before washing.
Step 2: Test a Small Area First
Before committing to the full deck, wash a small, inconspicuous section, roughly half a square metre near a corner or under where a planter will sit. Run the wand at your chosen distance and observe the result. If wood fibers begin to stand up or the surface looks fuzzy, you are using too much pressure. Increase your distance or switch to a wider nozzle angle.
This test also reveals how well the existing finish, if any, will hold up. If the old stain or sealer lifts easily, you may need to sand and refinish the entire deck after washing.
Step 3: Wash With the Wood Grain
Work in sections, spraying in the direction of the wood grain rather than across it. Water hitting the grain at an angle can lift the edges of individual wood fibers, creating a rough texture that is difficult to fix. Start at the far end of the deck and work backward toward your exit so you do not walk over freshly cleaned, slippery boards.
Maintain consistent motion with each pass overlapping the previous one by half the fan width. Keep the wand moving at a steady pace, roughly the speed of a slow walk. After washing a section, inspect it before moving on. If dirt remains, reapply detergent and brush it in rather than increasing pressure.
How to Remove Mould From Timber Decking Safely
Mould and mildew on timber decking is a common problem in humid climates, and the safe removal method is more about chemistry than pressure. High-pressure water alone will strip the visible black spots but leave the roots embedded in the wood, allowing regrowth within weeks. The how to remove mould from timber decking approach that lasts combines a targeted cleaner with gentle rinsing.
Apply a mould and mildew remover designed for exterior timber, working it into the affected areas with a stiff brush. Let it dwell according to the label, then rinse with the pressure washer held at 30 cm using a 25-degree nozzle. The goal is to wash away the dead mould, not to blast live spores deeper into the grain.
For heavy infestations, a second application may be necessary. After the deck dries completely, inspect for remaining dark streaks. Mould that persists after two treatments is likely growing within the wood structure itself, which means the affected boards should be replaced rather than repeatedly cleaned.
When to Sand Instead of Pressure Wash a Deck
Sanding becomes the better option when the deck’s surface is already rough, grey, or covered in a failing finish. Pressure washing smooths nothing; it only removes surface dirt. If your deck feels fuzzy to the touch or shows the raised grain that comes from years of weathering, washing will leave it clean but still rough, and the roughness will trap dirt again quickly.
The when to sand instead of pressure wash a deck decision comes down to the finish you want. If you plan to restain or seal the deck, sanding is almost always required first. A fresh coat of stain will not adhere well to a weathered, fibrous surface, and it will highlight rather than hide imperfections. Sanding with 60 to 80 grit paper removes the grey weathered layer and exposes fresh timber that accepts stain evenly.
For decks with heavy mould penetration, deep staining, or surface checking that has raised splinters, sanding is the only way to restore a smooth, refinishable surface. Pressure washing remains the right first step for decks that are structurally sound but dirty, where the existing finish is intact and you simply want to clean before recoating.
Eco-Friendly Cleaning Solution Recipes
If you want to avoid commercial chemicals, effective eco-friendly cleaning solutions for old decks use simple household ingredients. A solution of warm water mixed with oxygen bleach (sodium percarbonate) at roughly one cup per four litres of water lifts organic stains and mildew without the harsh effects of chlorine bleach. Apply it, let it dwell for 15 minutes, and rinse with plain water.
For general grime, a mild solution of warm water and a few drops of plant-based dish soap works well on lightly soiled decks. Avoid solutions that create heavy foam, which can be hard to rinse fully from the wood grain. Test any homemade cleaner on a small area first to confirm it does not discolour the timber. These recipes are gentler on surrounding gardens and stormwater systems than many commercial options, though they may require more scrubbing effort.
Common Mistakes to Avoid With Old Timber
The most frequent error homeowners make is treating an old deck like a concrete driveway. Concrete can handle 3000 PSI; timber cannot. Using a narrow nozzle, holding the wand too close, or lingering over a stain will all cut into the wood and create permanent grooves. Once the surface is furred or gouged, the only fix is sanding down past the damage or replacing boards.
Another common mistake is washing in direct sunlight. Detergent dries before it can work, leaving streaky residue that is harder to remove than the original dirt. Similarly, skipping the pre-treatment step forces you to rely on pressure alone, which is how most accidental damage happens. If the cleaner is doing its job, the rinse pass should require very little effort.
A final error is neglecting to address the cause of the grime. If your deck sits under a tree that drops sap or in a shaded area that stays damp, no cleaning method will keep it pristine for long. After washing and drying, consider applying a timber treatment or sealer that resists moisture and UV damage, and trim back foliage to improve airflow and sunlight. According to guidance on timber deck maintenance from the Australian Timber Decking Association, routine cleaning and proper ventilation are the most effective ways to extend the lifespan of a timber deck.
Conclusion: Preserve Your Deck's Lifespan
Safe pressure washing for old decks comes down to respecting the material. Keep the pressure between 1200 and 1500 PSI, use a 25-degree nozzle at 30 cm, wash with the grain, and let chemical cleaners do the heavy lifting. Test a small area first, and when the timber is too far gone, sand or replace rather than blast. The standards for timber decking construction and maintenance offer further reference for assessing structural soundness.
If this sounds like more risk than you want to take on a weekend, that is a reasonable call. Our team uses variable-pressure equipment and wood-specific techniques to clean timber decks without damaging the surface, and we handle the pre-treatment, rinsing, and runoff management for you. We also restore concrete, pathways, and exterior walls, so your whole property can be addressed in one visit. Pricing depends on the size and condition of your deck, so contact us for a quote.
Frequently Asked Questions
What PSI is safe for cleaning old timber decks?
For softwoods like pine, keep the pressure below 500 PSI. For hardwoods such as merbau or jarrah, you can go up to 1500 PSI, but always start lower. High pressure can strip the wood grain and create furring. Use a 25-degree or 40-degree fan tip to spread the force and maintain a consistent distance of at least 300 mm from the surface.
Should I use chemical cleaners before pressure washing my deck?
Yes, applying a deck cleaner or mould killer before washing makes the job safer and more effective. Let the solution sit for 10 to 15 minutes to break down grime. This reduces the time and pressure needed, which lowers the risk of surface damage to old timber. Always use products safe for your garden and rinse thoroughly.
How can I tell if my deck is too old for pressure washing?
Check for widespread rot, soft spots, or boards that are already splitting. If the timber is severely weathered with deep cracks, pressure washing can cause further damage. In these cases, sanding or replacing affected boards is the better option. A quick test in a hidden corner will show if the wood fibers hold up to the spray.
When should I sand instead of pressure wash my deck?
If your deck has a peeling finish or the surface feels rough and splintery, sanding is the right choice. Pressure washing removes dirt and mould but won't fix a failing coating. Sanding smooths the wood and prepares it for a new stain or seal. Use pressure washing for routine cleaning and sanding for restoration projects.
Get your deck looking its best without the risk of doing it yourself. [BOOK A CALL] with AquaBlast Elite and let our experienced team restore your timber safely.