 how-to
How to Restore Faded Concrete Driveway Color
Table of Contents
- Why Concrete Driveway Colour Fades
- Assessing Your Faded Concrete Driveway
- Step 1: Clean the Concrete Surface Thoroughly
- How to Stain a Concrete Driveway for Color Restoration
- Understanding Concrete Mottling Causes and Fixes
- Concrete Driveway Resurfacing as a Color Restoration Option
- How to Seal a Concrete Driveway After Color Restoration
- Maintenance and Durability After Restoration
- Frequently Asked Questions
Last Updated: October 15, 2026
Why Concrete Driveway Colour Fades
Concrete driveways lose colour through environmental exposure. UV radiation breaks down surface pigments, fading the installed colour to a dull grey or pale tone.
Moisture penetrates the porous surface, making colour look washed out and patchy. Salt spray accelerates fading, and freeze-thaw cycles damage the surface layer where the colour sits.
Traffic removes the top layer of coloured concrete, exposing lighter base material and creating a mottled look.
Assessing Your Faded Concrete Driveway
Before starting to restore a faded concrete driveway, evaluate your concrete's condition to determine the best method.
Look for these key signs:
- Uniform fading: The entire surface has faded evenly to a lighter shade. This is the easiest type to restore.
- Patchy discolouration: Some areas are darker or lighter than others. This often signals uneven sealing or moisture damage.
- Surface cracks or spalling: Small chips or flaking indicate the concrete itself is deteriorating, not just the colour.
- Moss or algae growth: Green or black patches suggest moisture retention, which affects colour restoration durability.
Run your hand across the surface: rough and chalky means thorough cleaning is needed before colour work; smooth means better condition.
Check whether your driveway was originally sealed: sealed concrete fades uniformly, while unsealed concrete shows patchy fading because moisture penetrates unevenly.
Document the original colour if you have photos or samples; otherwise decide whether to restore the original shade or try a new colour.
Step 1: Clean the Concrete Surface Thoroughly
Cleaning is a diagnosis followed by targeted treatment. What looks like faded colour is often one of four problems, each needing a different clean before any colour product bonds:
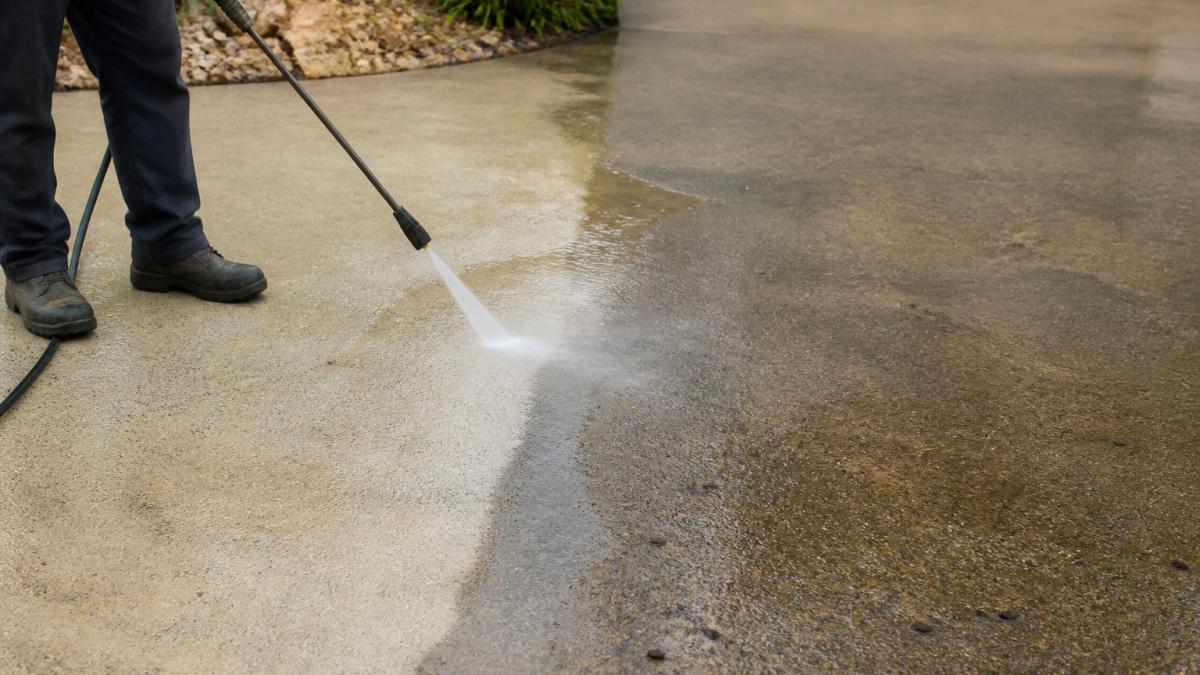
- Surface dirt and traffic film, grey-brown grime that lifts with water and detergent. The easiest to remove and the most common cause of a "faded" appearance.
- Efflorescence, a white, powdery deposit of mineral salts drawn up by moisture. It won't wash away with plain water and will bleed through stain or sealer if left.
- Mildew, algae and lichen, green, black or grey growth in shaded areas, along expansion joints and at the base of walls.
- Failed sealer, a peeling, chalky film that blocks new colour from reaching the concrete. This is the one most homeowners misdiagnose as fading.
Run three tests before cleaning.
- The water test. Pour a cup of water on the surface. If it beads and sits, sealer or a contaminant is present. If it soaks in within seconds, the concrete is open and will accept stain.
- The scratch test. Drag a screwdriver or coin across a small area. If a film peels or powders off, you have a failing sealer and need a stripper, not just a wash.
- The fizz test. Drip vinegar on a white patch. If it fizzes, the deposit is likely efflorescence, not dirt.
Match the clean to the problem.
- General grime: Use a concrete detergent or a degreaser for oil and tyre marks, scrubbed with a stiff broom, then rinsed.
- Efflorescence: Dry-brush first, then wash with a diluted acid-based concrete cleaner and rinse thoroughly. Do not seal over it, as trapped salts will push the coating off.
- Mildew and algae: Use a sodium hypochlorite-based cleaner, applied, dwelled, then rinsed. Keep it off garden beds and metal.
- Failed sealer: Use a solvent or gel concrete stripper, applied in sections, allowed to dwell, then removed with a scraper and rinse before pressure washing.
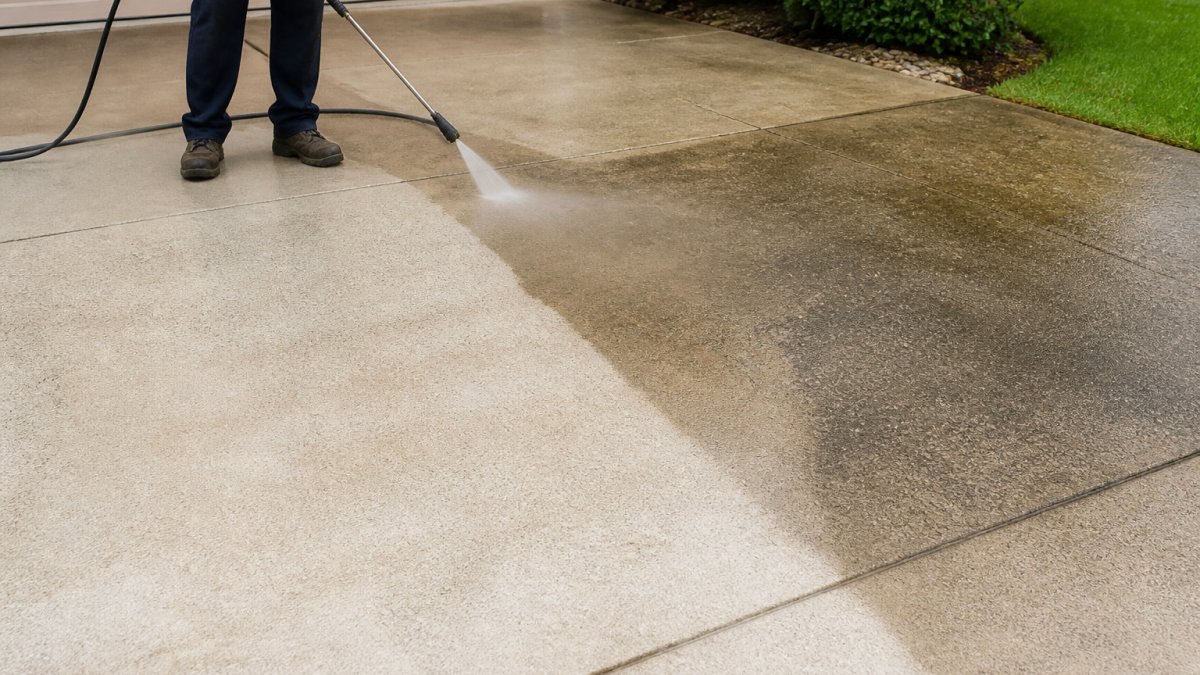
Pressure washing settings. Use a rotary surface cleaner rather than a bare wand; it cleans more evenly and avoids zebra striping.
Order of operations. Strip failed sealer first, then degrease, then treat biological growth, then pressure wash, then rinse and neutralise any acid.
Drying is part of the clean. Concrete must be dry to the touch and below the surface before stain or sealer goes on.
How to Stain a Concrete Driveway for Color Restoration
Staining is one of the most effective ways to restore faded concrete driveway colour.
There are two main types of stains:
Acid-based stains react with concrete minerals for earthy, variegated colours. They are durable but need careful application and ventilation, with unpredictable results because mineral content varies.
Water-based stains sit on top of the concrete and offer more consistent, controllable colour.
Application steps:
- Tape off edges where the driveway meets the house, landscaping, or other surfaces.
- Apply stain with a roller or sprayer in thin, even coats.
- Work in small sections to maintain a wet edge and avoid lap marks.
- Follow the product's drying time before applying a second coat.
- Most stains need 2-3 coats for full colour depth.
Allow 48-72 hours of curing before walking on the surface, avoiding rain if possible.
The key to how to stain a concrete driveway for colour restoration is patience; rushing or applying too thickly creates blotchy results.
Understanding Concrete Mottling Causes and Fixes
Mottling, patches of darker and lighter colour mixed together, is one of the most common problems when restoring faded concrete driveway colour.
Mottling happens for several reasons:
- Uneven moisture: Some areas absorb water faster, affecting how stain or sealer applies.
- Inconsistent concrete mix: The original batch had variations in pigment or curing.
- Sealer failure: Old sealer peels unevenly, leaving some areas protected and others exposed.
- Algae or mould growth: Shaded areas develop growth that interferes with colour absorption.
To fix mottling:
- Deep clean the entire surface with a pressure washer and concrete cleaner.
- Etch the concrete with a mild acid solution to open the pores evenly.
- Neutralise the etching agent completely with a rinse and dry cycle.
- Apply colour product in thin, even coats using consistent pressure and speed.
If mottling persists after staining, consider a concrete overlay or resurfacing. This gives you a completely new, uniform surface to work with.
Concrete Driveway Resurfacing as a Color Restoration Option
When staining alone won't deliver, resurfacing applies a new layer of concrete over the existing driveway, giving a fresh, uniform surface with colour baked in.
This approach works best when:
- Your driveway has extensive cracking or spalling.
- Mottling is severe and won't respond to staining.
- You want a completely new appearance.
- The existing concrete is too damaged for simple colour restoration.
Resurfacing typically involves:
- Pressure cleaning and etching the old surface.
- Applying a bonding agent so the new layer adheres.
- Pouring a thin concrete overlay (usually 25-50 mm thick).
- Finishing with colour, texture, or decorative options.
- Sealing the new surface.
Cost and complexity are higher than staining, but results are more dramatic and longer-lasting; a resurfaced driveway can look brand new for 10-15 years with proper maintenance. Work with a professional: technique, curing conditions, and material ratios all affect the result, and poor execution leads to cracking, peeling, or colour inconsistencies.
How to Seal a Concrete Driveway After Color Restoration
Sealing locks in restored colour and is the difference between a finish lasting a couple of years and one lasting most of a decade.
Check the conditions before you open the tin.
- Temperature: Apply when surface and air temperatures are within the sealer's stated range, commonly above about 10°C and below roughly 30°C. Cold slows curing; heat makes the sealer skin over before it levels.
- Rain: Leave a clear window of at least 24-48 hours after application. Rain on a tacky sealer ruins the finish.
- Sun and wind: Avoid direct midday sun or strong wind, which dry the sealer too fast and leave lap marks. Early morning or late afternoon on a mild, still day is ideal.
- Moisture: Confirm the concrete is dry using the plastic-sheet test. Sealing damp concrete is the most common cause of a milky, peeling finish.
Choose the sealer to match the job.
- Acrylic sealers, the budget option and easiest to apply. Good UV stability and colour enhancement, but they wear fastest under vehicle traffic and typically need recoating every 1-2 years on a driveway.
- Polyurethane sealers, tougher, more abrasion- and water-resistant, and better suited to driveways. Expect roughly 3-5 years between recoats.
- Epoxy sealers, the hardest-wearing and most chemical-resistant, but also the most expensive, the least UV-stable in some formulations, and best left to a professional on a large driveway.
Also decide between a film-forming sealer (glossy or satin, sits on top and enhances colour) and a penetrating sealer (soaks in, leaves a natural matte look, breathes better and resists hot-tyre scuffing).
Application, step by step.
- Confirm the surface is clean, fully dry, and free of dust.
- Mask walls, garden edges, garage doors, and neighbouring surfaces; sealer is difficult to remove once cured.
- Stir thoroughly; do not shake, which introduces bubbles.
- Apply with a solvent-resistant roller on a pole, working in 1-2 metre sections and maintaining a wet edge so sections blend.
- Apply two thin coats rather than one thick one. Thick application causes cloudy, blistered finishes.
- Allow the first coat to dry to the manufacturer's recoat window, then apply the second at right angles for even coverage.
- Keep traffic off for the full cure time, commonly 24-48 hours before foot traffic and 48-72 hours before vehicles. Err on the longer side in cool or humid weather.
Reseal intervals. Plan on resealing every 2-3 years for a typical acrylic-sealed driveway, annually on high-traffic or sun-baked driveways, and every 3-5 years for polyurethane.
Maintenance and Durability After Restoration
Your restored driveway colour lasts only as long as you maintain it; regular care extends its life significantly.
Monthly maintenance:
- Sweep away debris and leaves.
- Rinse the surface with a garden hose to remove dust.
- Spot-clean stains as they appear.
Seasonal maintenance:
- Pressure wash in spring to remove winter grit and salt.
- Check for cracks or damage and seal them promptly.
- Reapply sealer as needed (typically every 2-3 years).
What to avoid:
- Harsh chemicals or salt-based de-icers.
- Parking heavy machinery on the surface.
- Letting oil or grease sit; clean spills immediately.
- Neglecting drainage issues that lead to pooling water.
Expected durability after restoration depends on the method you chose:
- Stained and sealed concrete: 5-7 years of vibrant colour with annual sealing.
- Resurfaced concrete: 10-15 years with proper maintenance.
- Topical colour coatings: 2-4 years before fading returns.
Climate affects durability: high-sun driveways fade faster, coastal properties face accelerated fading from salt spray, and cold climates with freeze-thaw cycles show faster wear.
At AquaBlast Elite, we recommend a professional pressure wash and inspection every 12-18 months to catch small problems before they become expensive repairs.
A faded concrete driveway affects your home's curb appeal and property value.
Frequently Asked Questions
What causes concrete driveway colour to fade?
Concrete driveway colour fades due to sun exposure (UV rays break down surface pigments), moisture penetration, freeze-thaw cycles, and oxidation. Traffic wear, chemical spills, and lack of sealing accelerate the process. Once the protective sealer deteriorates, the underlying concrete becomes vulnerable to discoloration and weathering.
Should I stain or resurface a faded concrete driveway?
Staining works best for driveways with minor fading and sound concrete. It's cost-effective and less invasive. Resurfacing suits driveways with deep cracks, uneven wear, or severe discoloration. If your concrete is structurally compromised or patchy colour is widespread, resurfacing provides a fresh, uniform finish. Assess surface condition first to decide.
How long does concrete driveway sealer take to dry?
Most concrete sealers require 24 to 48 hours of drying time before foot or vehicle traffic. Cure time varies by product, temperature, and humidity. Cool or damp conditions extend drying. Check the manufacturer's instructions on your specific sealer, as some speciality products may cure faster or slower depending on formulation and application conditions.
Can you apply a new sealer over an old concrete driveway sealer?
Yes, but only if the old sealer is still bonded and in good condition. If it's peeling, flaking, or worn, you must remove it first. Clean the surface thoroughly and test adhesion before applying new sealer. Applying fresh sealer over a degraded old layer can trap moisture and cause failure. When in doubt, strip the old sealer for best results.